Exporting data to Google Sheets
In this article, we’ll export a table from Y42 to a Google Sheet.
Step-by-Step guide
Step 1:
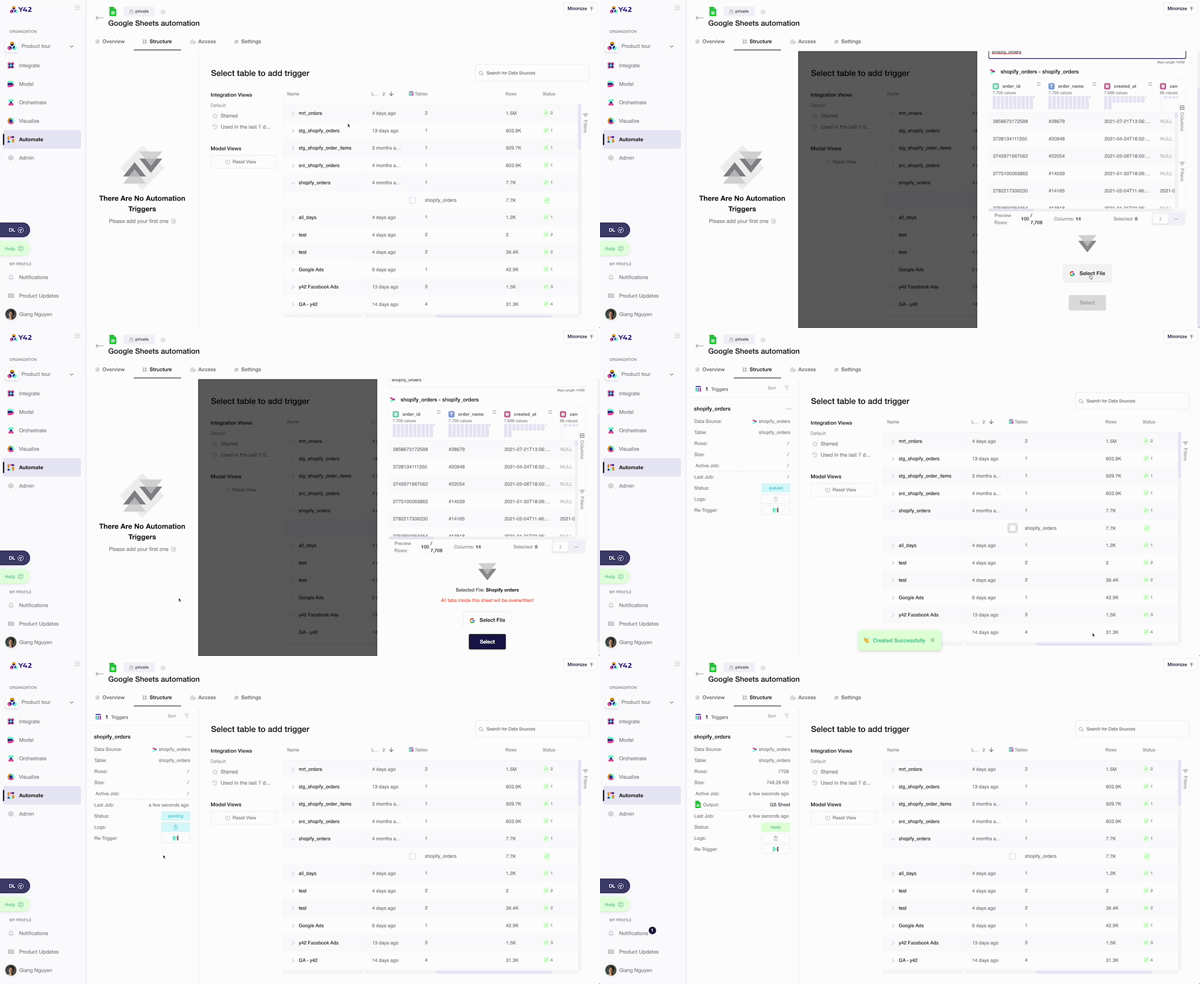
Create an empty Google Sheet with https://sheets.new/ and name it accordingly (use the name of the table you want to export from Y42 to Google Sheets)
Step 2:
Go to the Automations workspace and click on Add on the top-right corner.
Step 3:
Add a Google Sheets automation and name it as the table you want to export.
Step 4:
Step 5:

Step 6:

Adding your Automation to an Orchestration
Include your automation to an orchestration to let your export be updated whenever new data is imported.

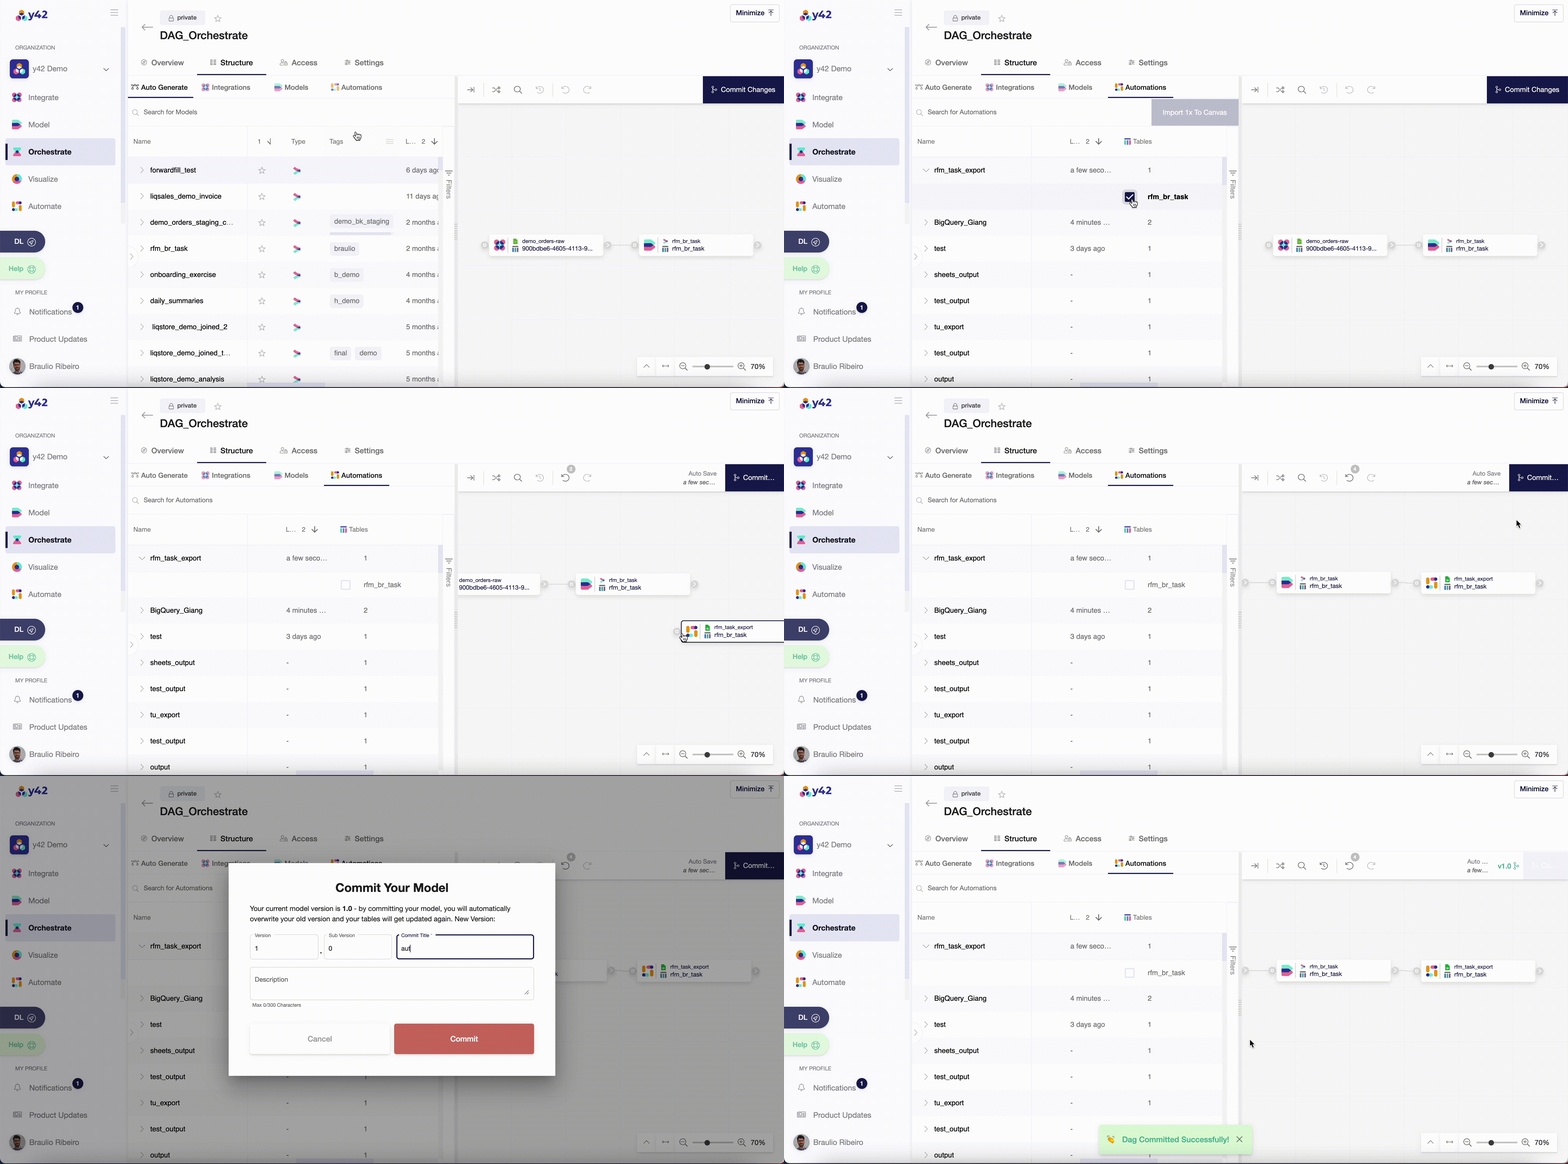
- Once you have a DAG created inside your Orchestrate, you can click on Automations to add your automation to the DAG pipeline. (refer to the Orchestration article for more information)
- Connect your Automation node to the table that is the source for your automation.
- Click on Commit Changes.
Remarks
Please note that, currently, the export overwrites the whole Google Sheet. That means each table can only be exported to one Google Sheet. Every scheduled export, therefore, is overwritting the entire Google Sheet. That means that any additional added tabs in your Google Sheet will deleted during the overwriting process.