Xero Integration
In this article, we’ll integrate a Xero data source with Y42.
Xero is a cloud-based accounting software platform for small- and medium-sized businesses.
You can find the list of available reports and the available dimensions and metrics for each report on the Xero API documentation.
Overview
Authentication: App Credentials
Settings: Historical Date selection
Schema type: Fixed
Update Type: Incremental
Authentication
Application credentials are username:password combinations and have a one-to-one binding with a membership in the consortia. They are strictly isolated to the environment in which they are created and can only be used to access a node/service owned by the same membership that created the credentials.
Import Settings
By default, the historical date will be set to one year ago. Refer to your own data source to decide from which exact date you would want to retrieve data.
Schema
You can find the full list of available reports and their columns/dimensions/metrics you are able to import to your Y42 instance on Xero's API documentation.
Updating your data
Xero has an incremental import that uses the column updateddateutc. This means your incremental import will also update already existing items. There is no need to regularly schedule a full import for updates.
When you set a schedule for Xero, the first time Y42 will do a full historic import but each time afterward an incremental one.
Xero Setup Guide
Note: In order to connect Lever with Y42, you will need to have a Xero Account and you will need to create an app in Xero.
- Log in to the Xero developer environment.
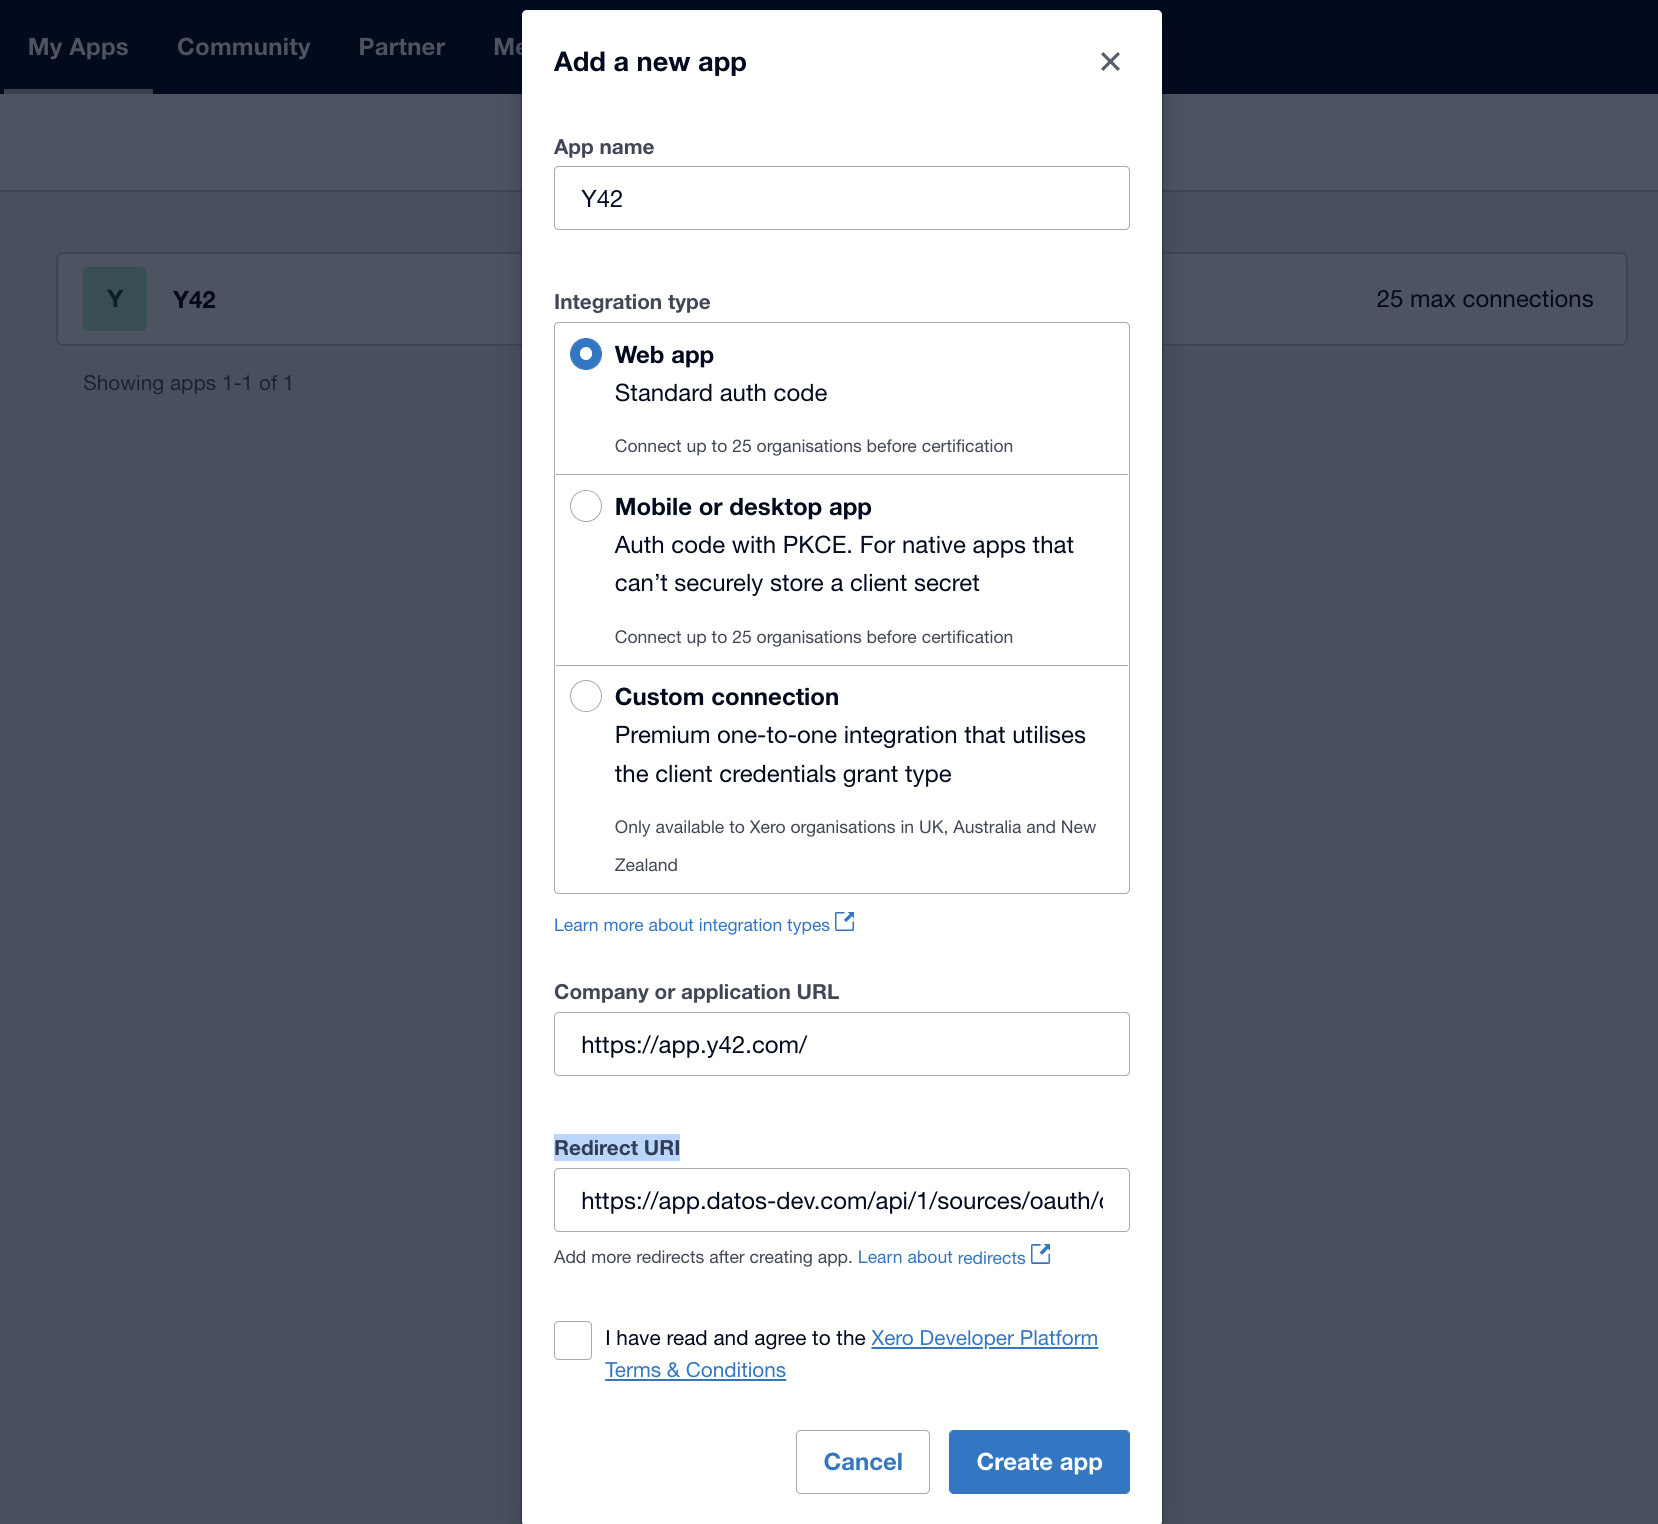
- Go to the My Apps section and create a new app.
- Fill out the form as follows:
- Integration type: Web app
- Company or application URL: https://app.y42.com
- Redirect URI: https://app.datos-dev.com/api/1/sources/oauth/callback - Accept the Xero Terms & Conditions and create the app.

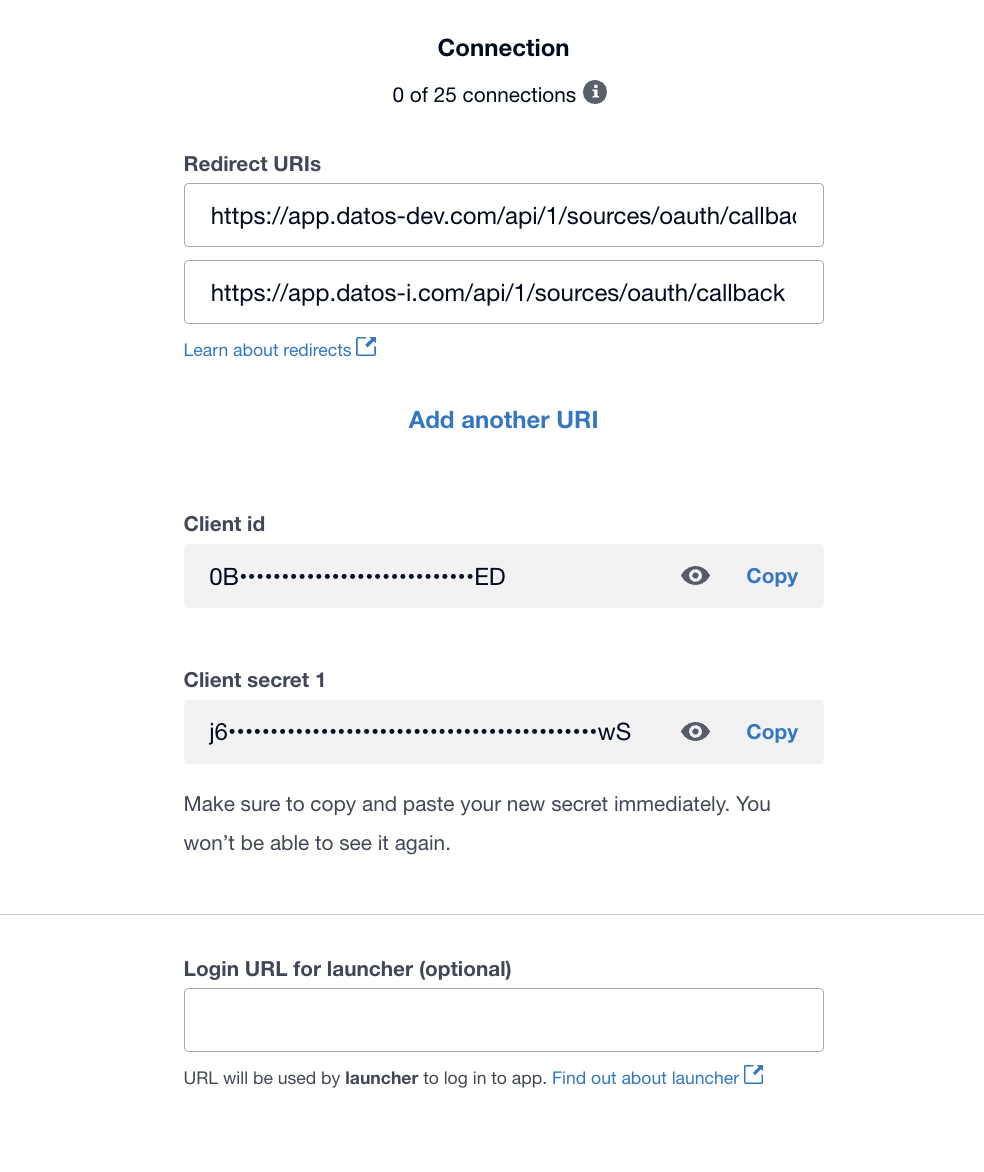
- Afterwards, your app is created and you will be forwarded to the App details page. Please go to the Configuration page and click on Add another URI to add following link: https://app.datos-i.com/api/1/sources/oauth/callback
- Save your new configurations of the app and copy the Client ID and generate a secret and copy it as welll.

- Now you have everything you need to connect Y42 with Xero. Go to you Xero integration in Y42 and paste in the Client ID and secret.
- Accept our terms of use.

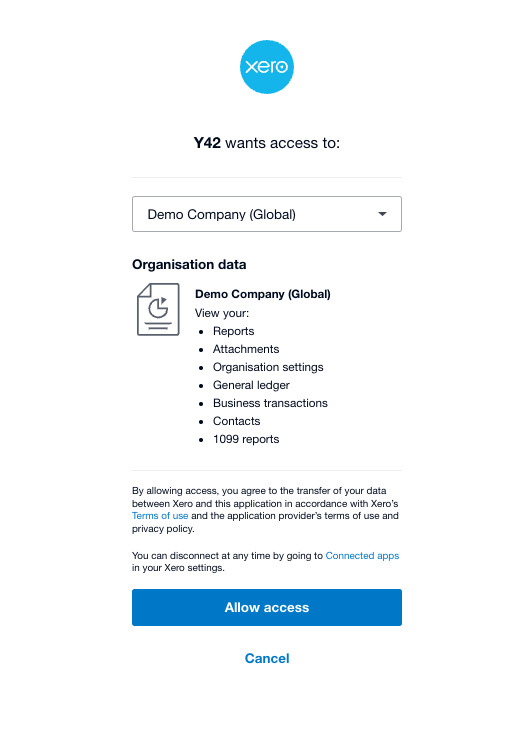
- Select the account from which you want to import data and select the date from which the integration should start to import data.
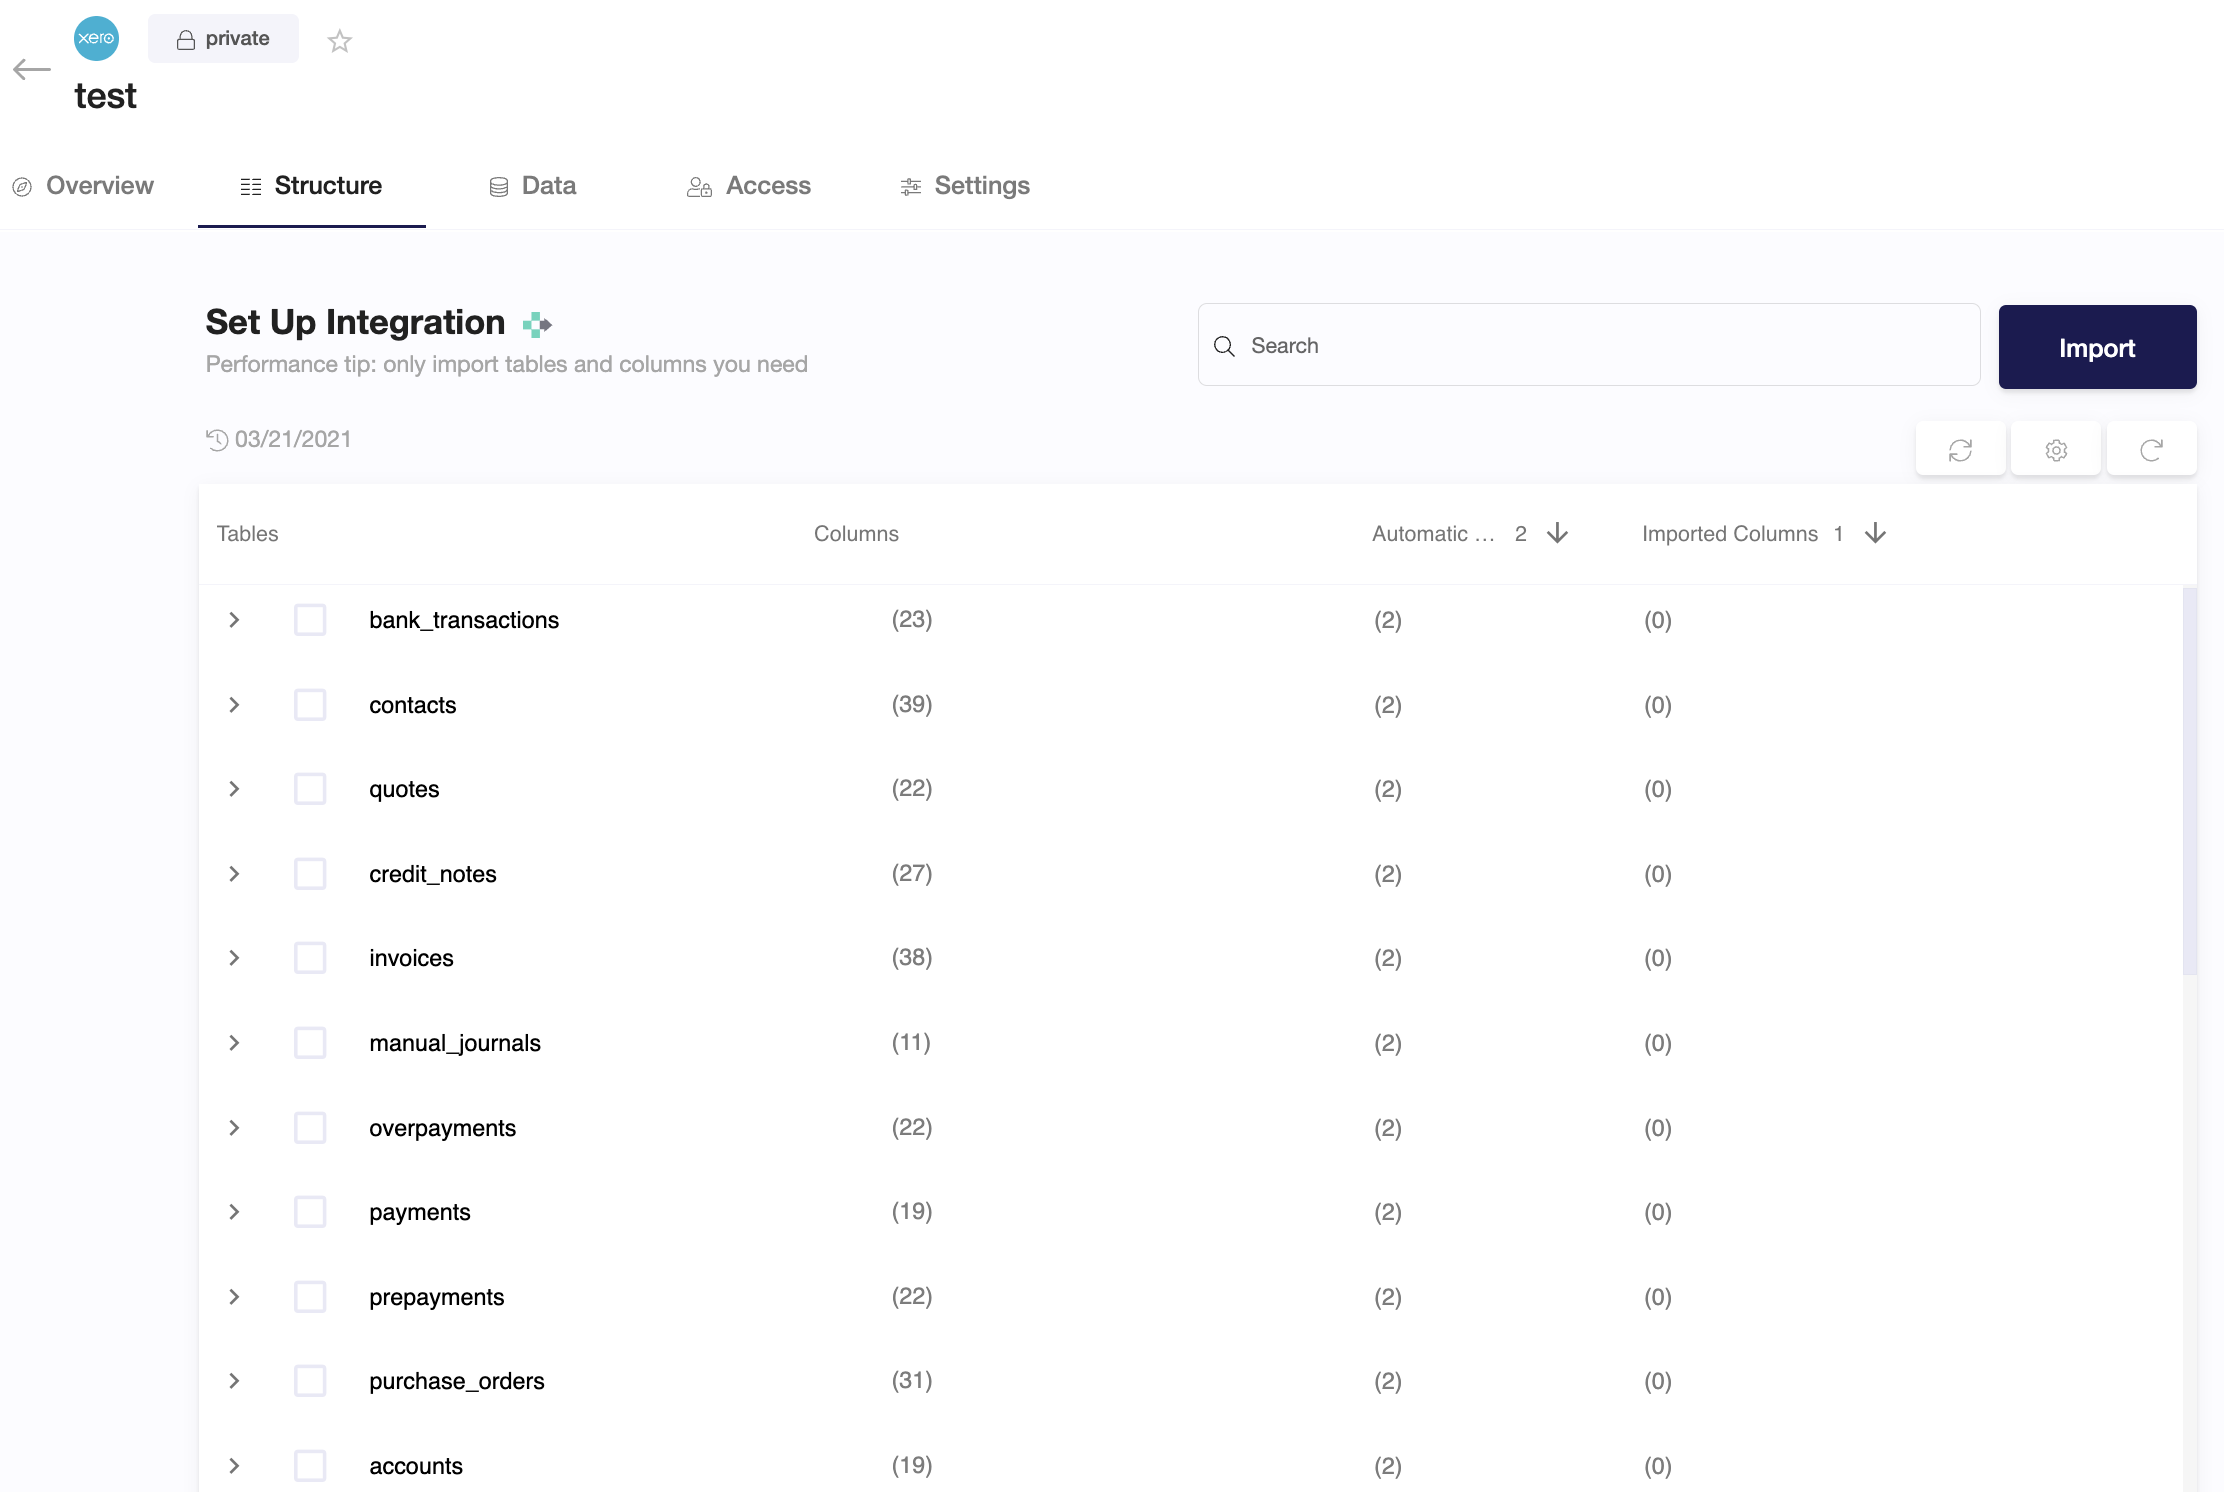
- Select the tables you need and click import. You can start accessing the tables once the status is “Ready”.

Note: You can always import and re import other tables as well, or delete them.