Shopify Integration
In this article, we’ll integrate a Shopify data source with Y42.
Shopify integration replicates data via the Shopify API. You can find the full list of available objects and tables you are able to import to your Y42 instance on Shopify's API documentation.
A guide on how to best understand and use the data from the API is available here on the Shopify Raw Data Guide.
Overview
Authentication
Import Settings
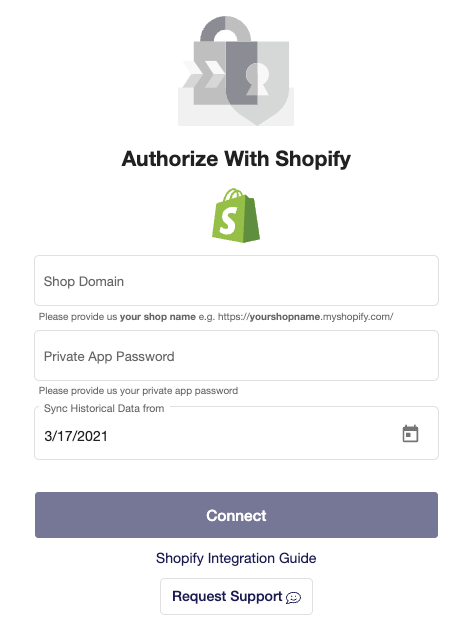
By default, the historical date will be set to one year ago. Refer to your own store to decide from which exact date you would want to retrieve data. Please note that the initial import of historical order data can only include 1 year. Therefore, please trigger another incremental import after the initial import to get all order data.
Schema
You can find the full list of available reports and their columns/dimensions/metrics you are able to import to your Y42 instance on Shopify's API documentation.
Updating your data
Shopify has an incremental import that uses the column updated_at. This means your incremental import will also update already existing items. There is no need to regularly schedule a full import for updates.
When you set a schedule for Shopify, the first time Y42 will do a import full historic import but each time afterward an incremental one.
Shopify Setup Guide:
1. On Integrate, click on "Add..." to search for Shopify and select it.
2. Name your integration.
3. Sign in with your Shopify credentials:
- Your Shop’s Name (the name before ".myshopify.com" in your Shopify URL. Example, if your URL is "yourshopname.myshopify.com", then your shop name is "yourshopname" .
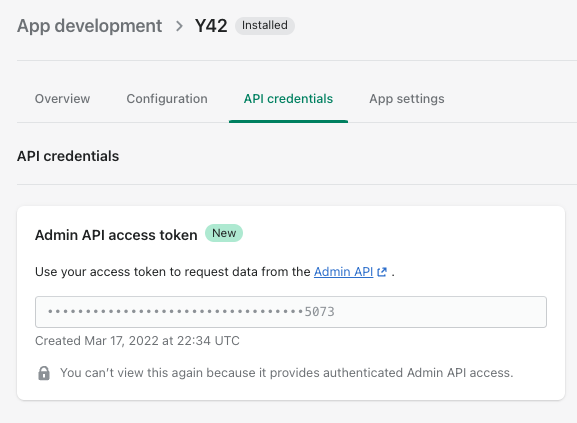
- The Admin API access token from the custom app you have created before in custom apps in Shopify:


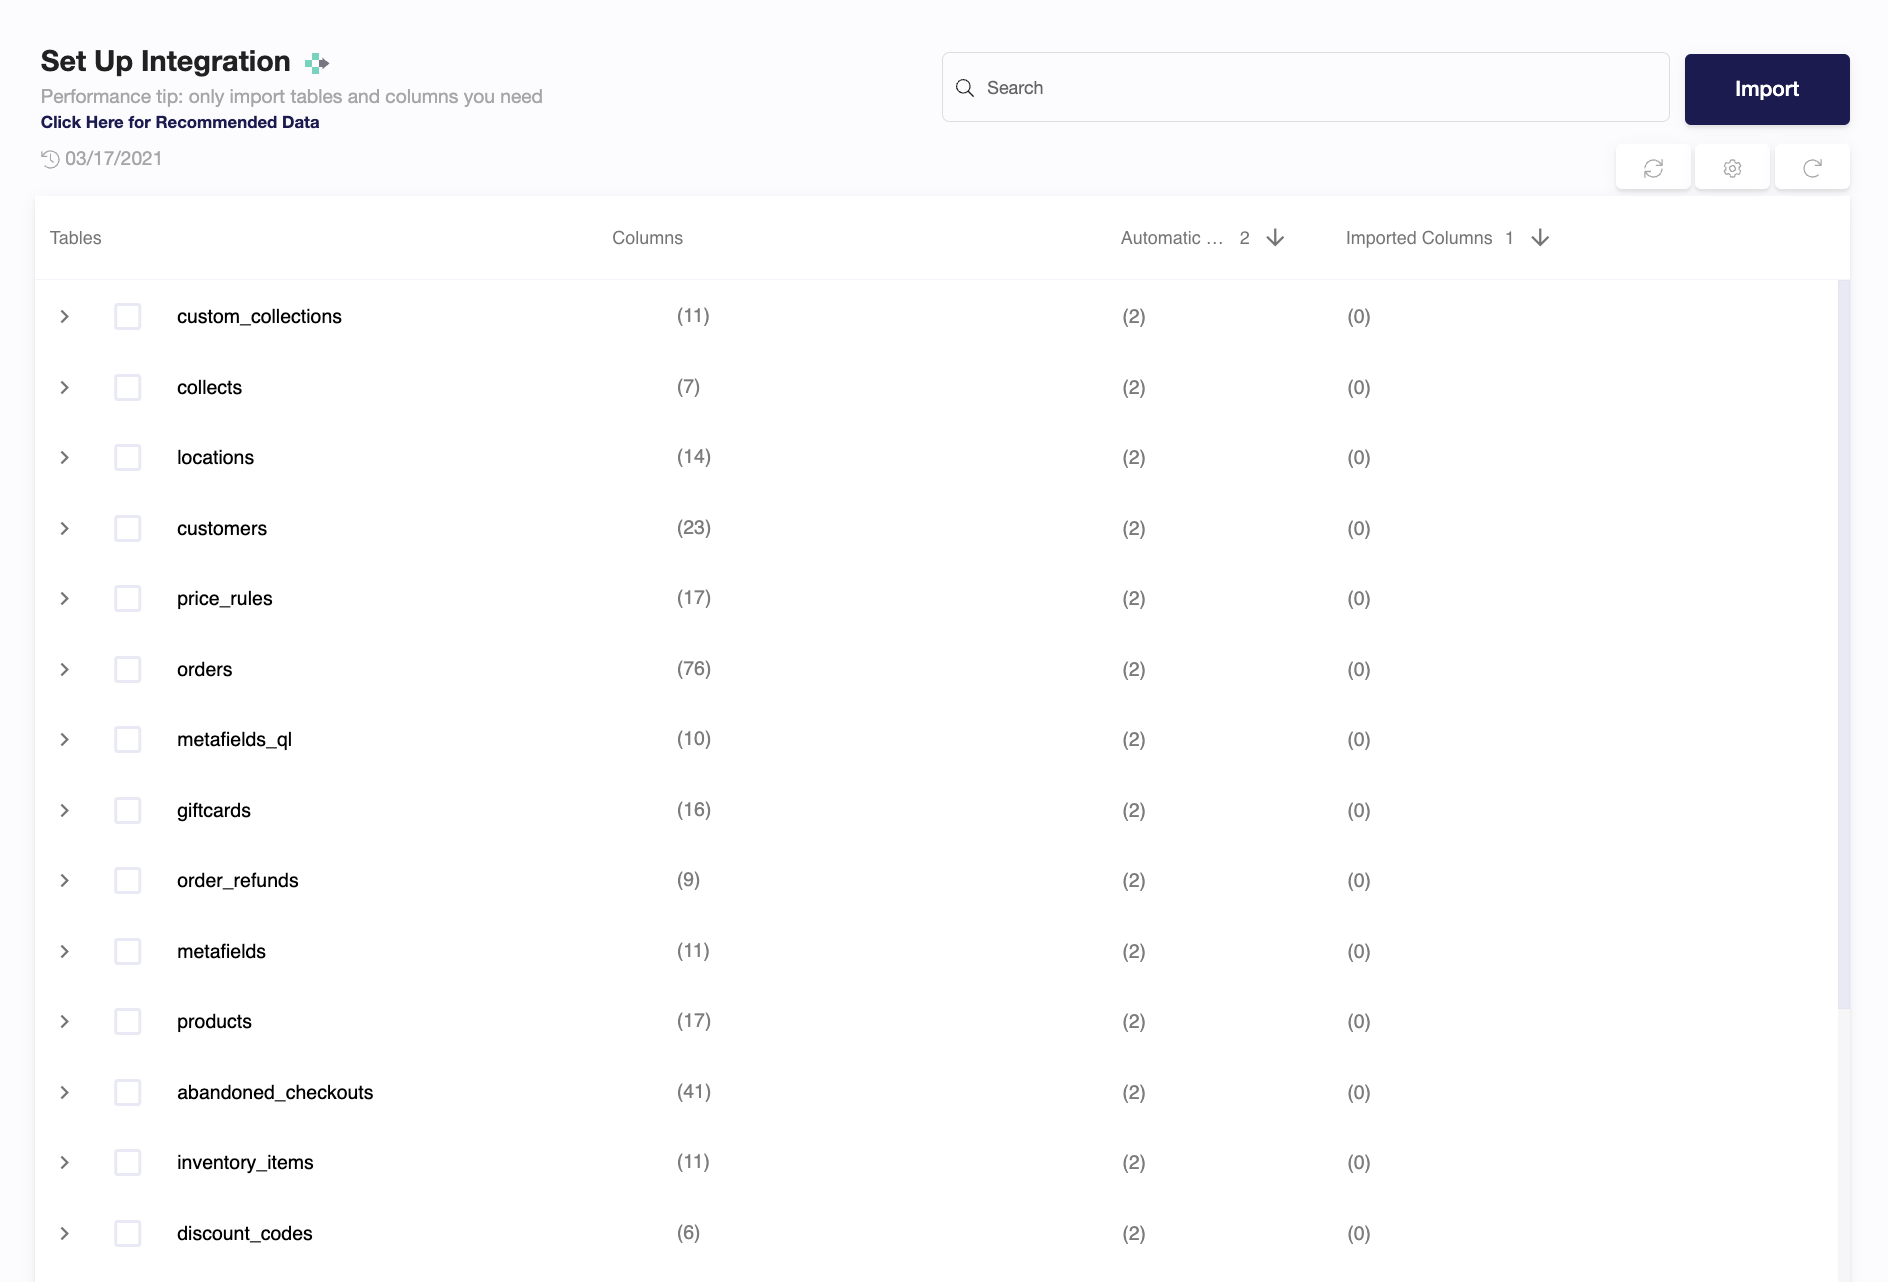
4. Once you have connected your Shopify account with Y42, you can start importing your tables.

5. Select the tables you need and click import. You can access the tables once the status is “Ready”.
Note: You can always import and reimport other tables as well, or delete them.