2.2 Clean and prepare your order data for dashboards and reports
📊 Outcome: Create an order table ready for dashboard & reports
🕑 Estimated Time: ~30min
IntroductionIn this section, you will learn how to prepare your raw Shopify order data for a first simple order table that you can use for a first dashboard or reporting use case.
|
Step-by-step guide
|
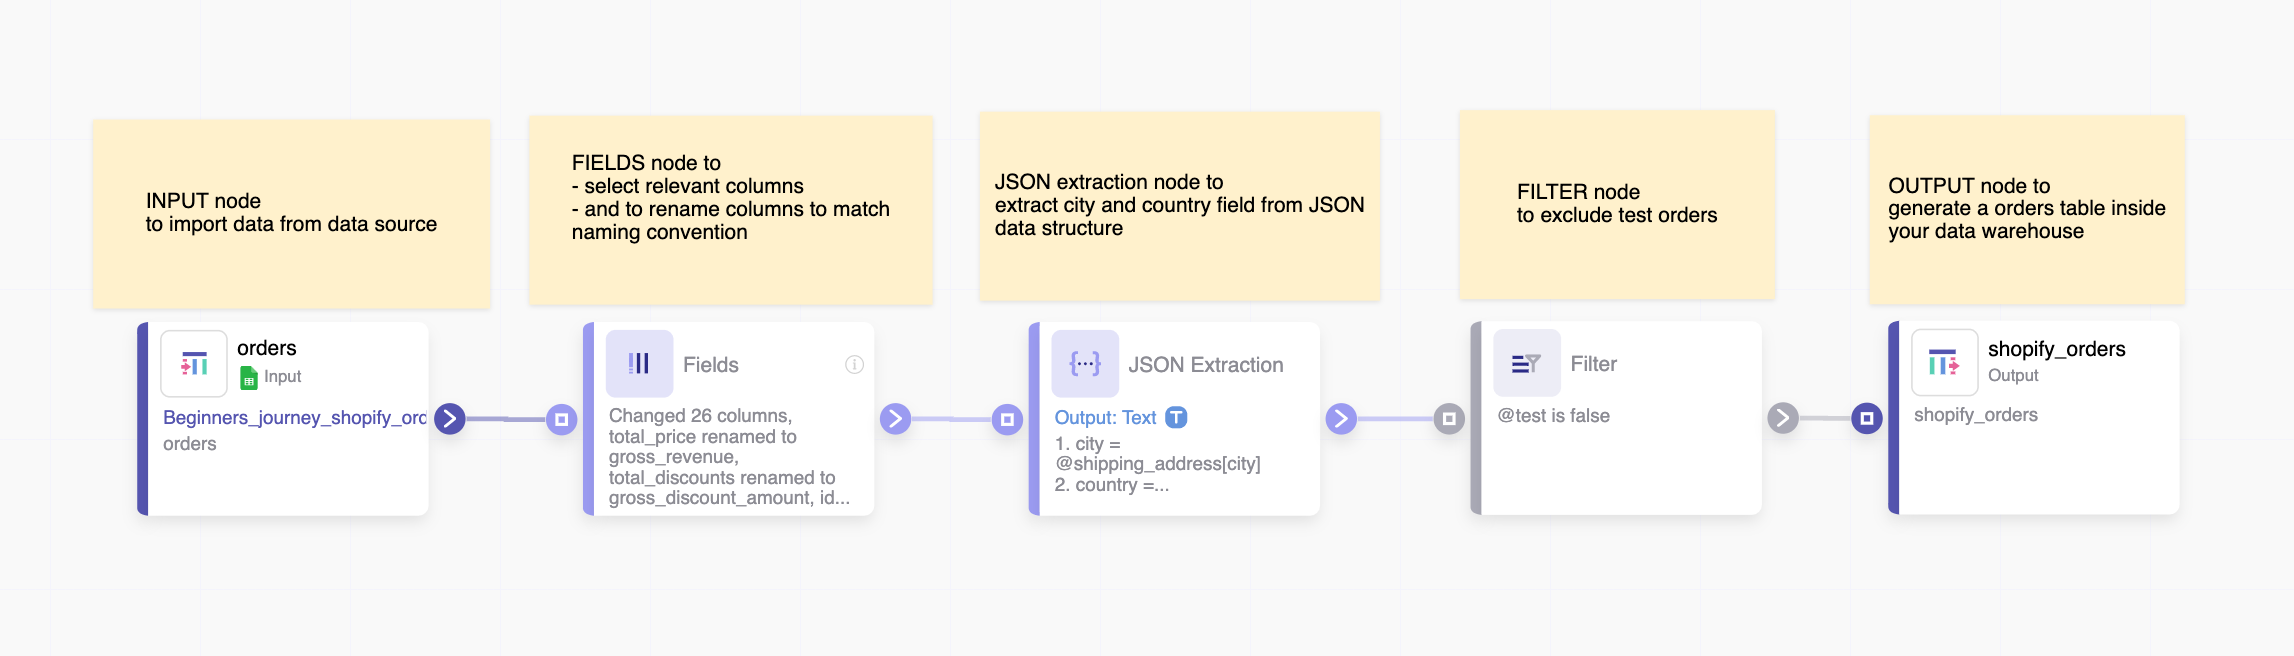
Step 1: Select relevant columns
|
Step 2: Rename columnsRename the columns to match your company's naming convention. Yellow highlighted columns will indicate changes.
|
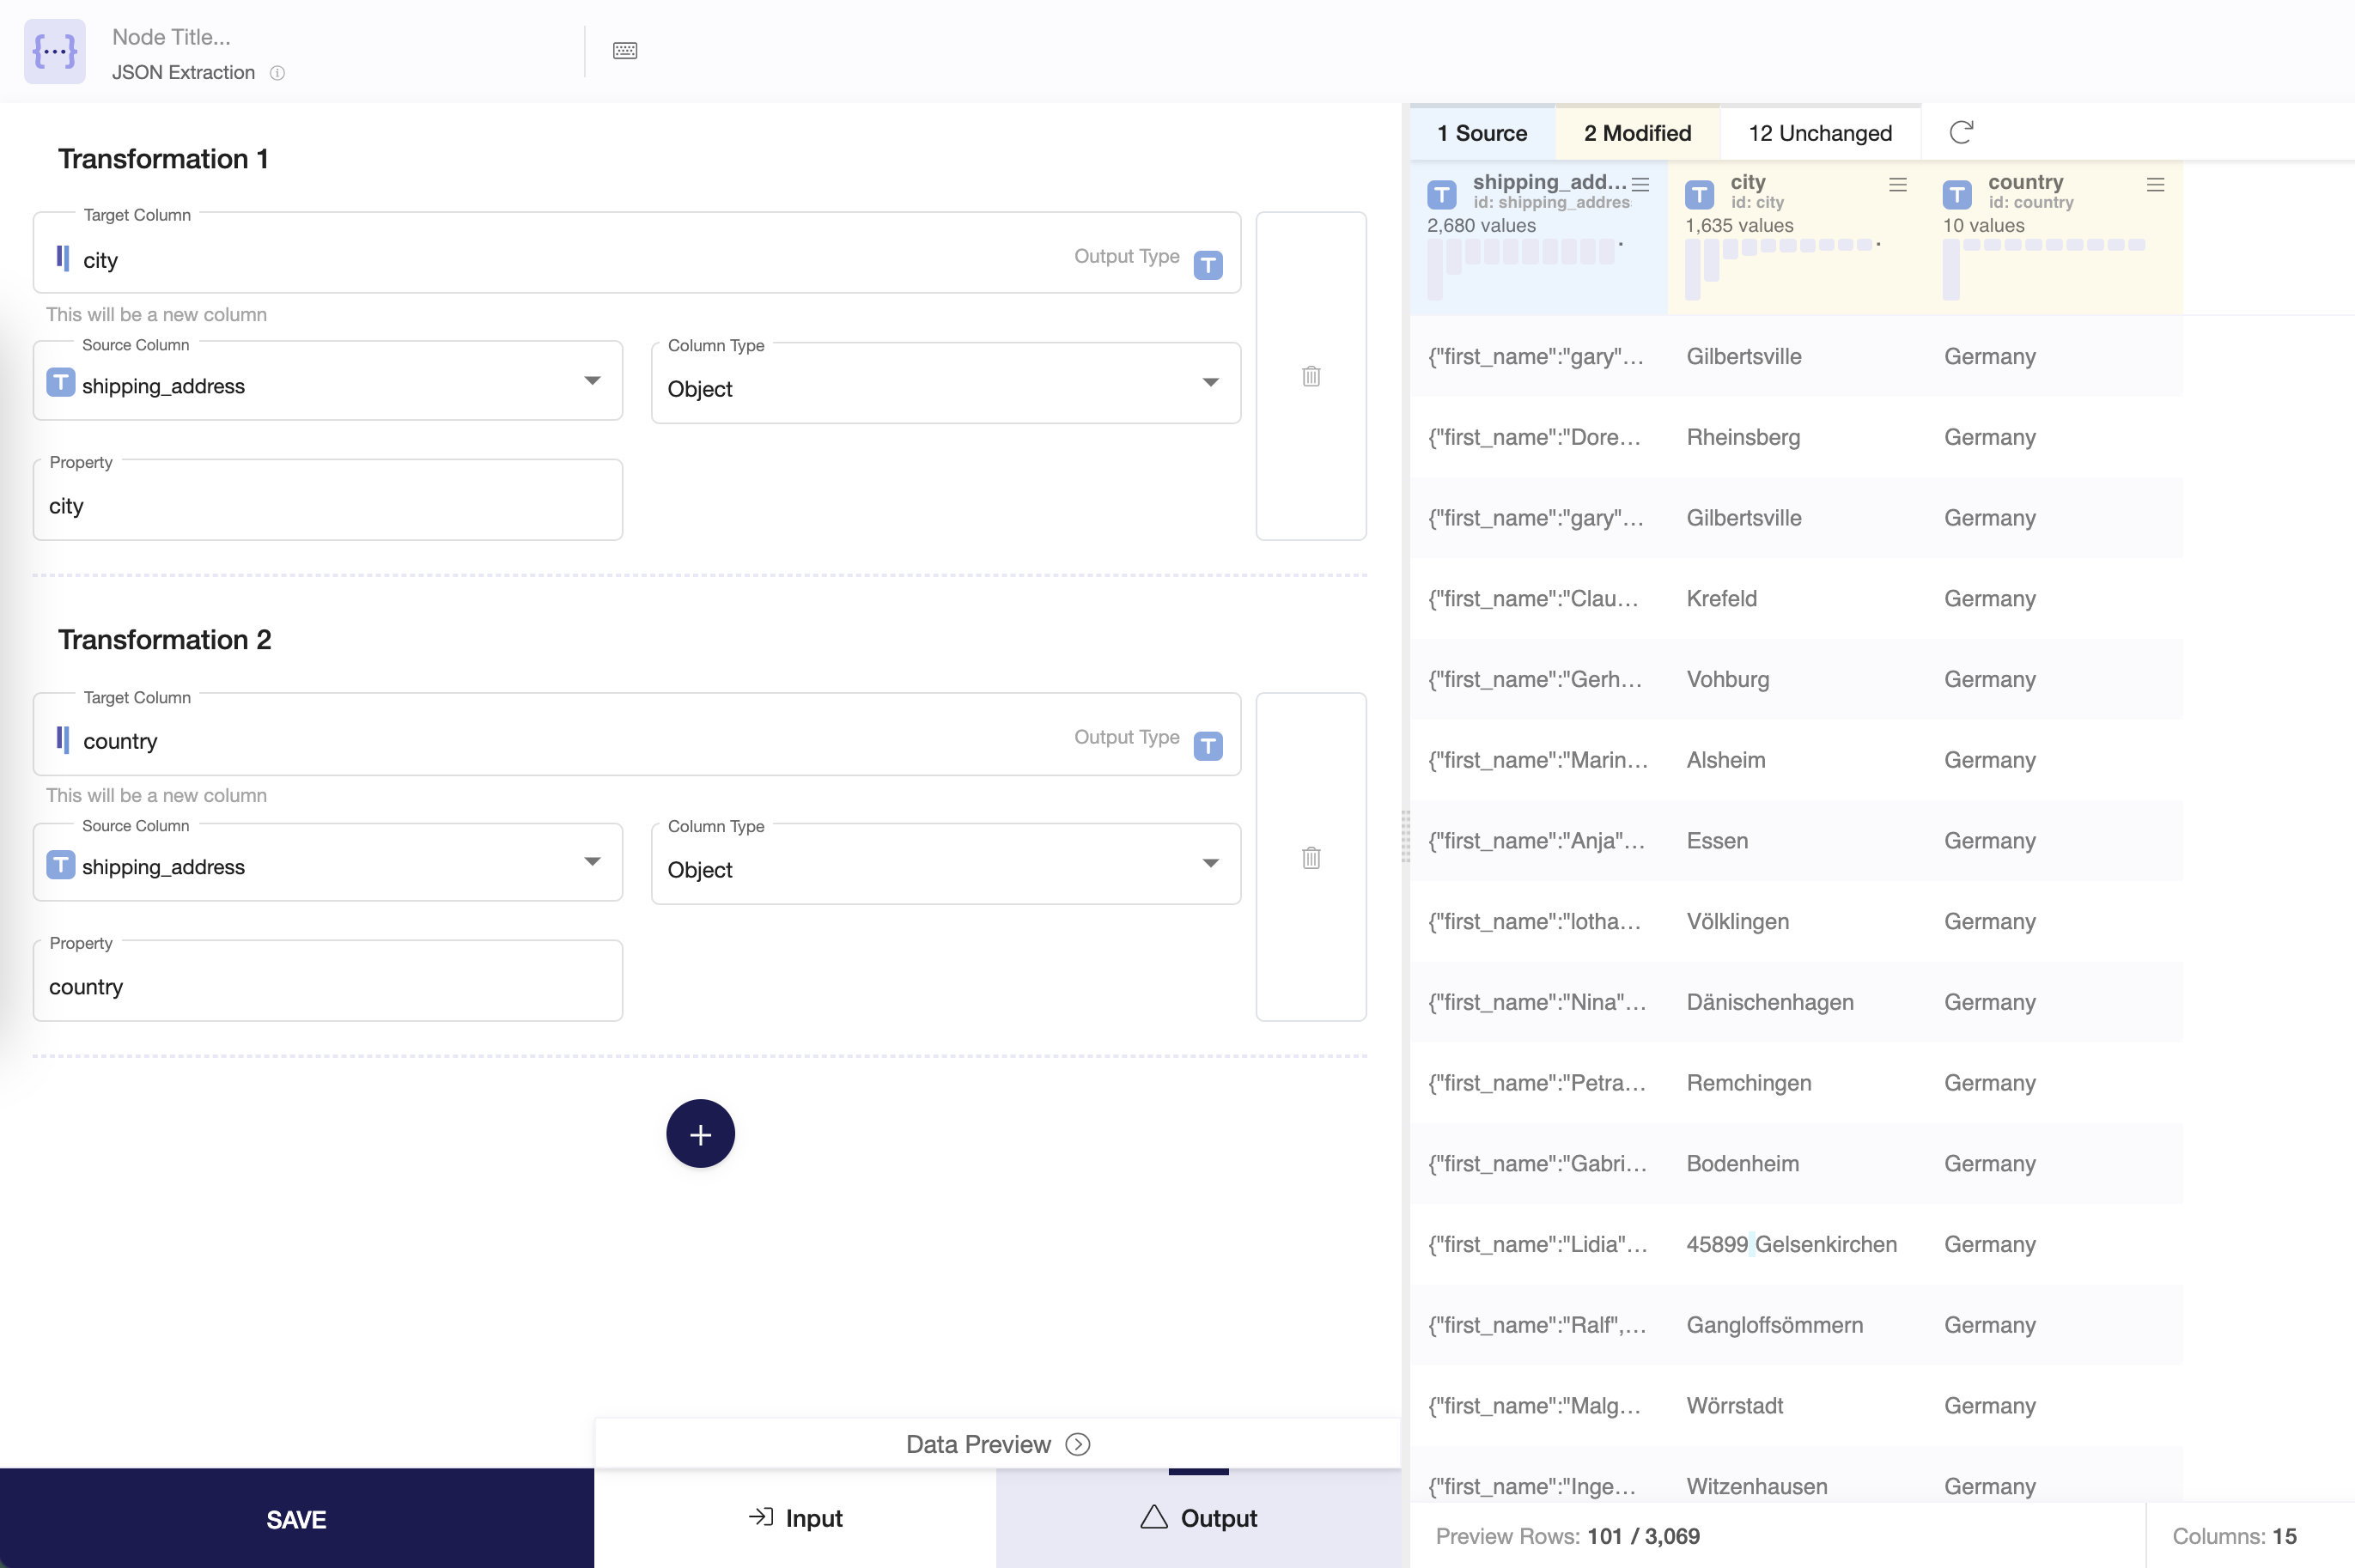
Step 3: Extract fields from shipping_addressAdd a JSON extraction node in order to extract the columns "city" and "country" from the JSON column "shipping_address". JSON or JavaScript Object Notation is a standard text-based format for displaying structured data. JSONs are built on two structures:
|
Step 4: Filter out test ordersUse a FILTER node in order to select only rows where the column "test" is 'false'. |
Step 5: Create an OUTPUT nodeFinalize your model by adding an OUTPUT node. Now you can determine a name for your output table. The OUTPUT node has similar functions as the FIELDs node. Additionally, you can determine a custom sequence of the columns. |
Step 6: Commit the modelBy committing the model you will safe your model and create your output table. |
Video Explanation
|
Next Step ➡️:2.3 Visualize order data in a dashboard
|