Transpose Function
The Transpose Node is used to turn columns into rows. In this article, we'll show you how to add and set up a Transpose Node.
Note: In order to use the Model feature you already should have already imported data sources into Y42.
Adding the Transpose Node to Your Model
- Select Model on the right of your window and click Add Model. Name your new Model and choose a privacy level.
- Create at least one input table by dragging & dropping the Input field into your data model structure. Choose a data table by clicking on it, then click Apply.
- Drag & drop a Transpose Node close to the Input field.
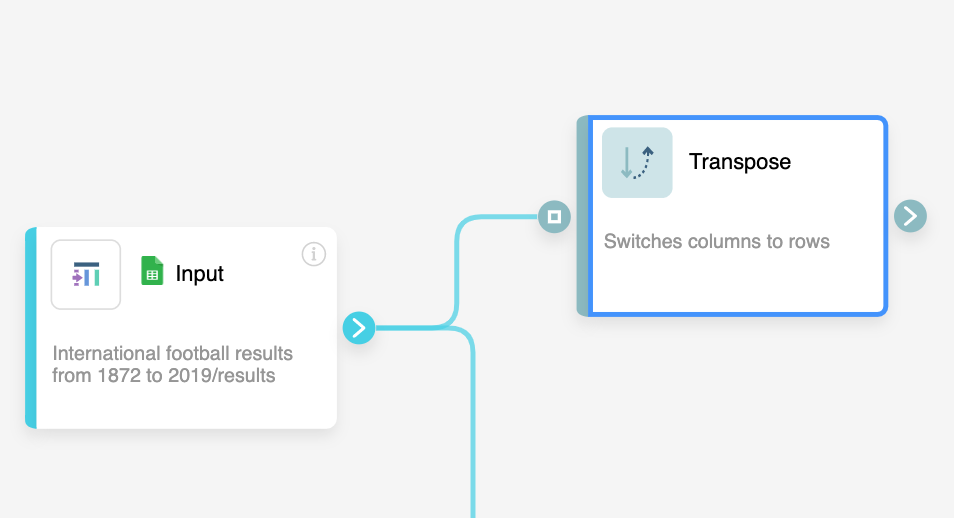
Setting up your Transpose Node
- Click on the Transpose Node to apply the settings.
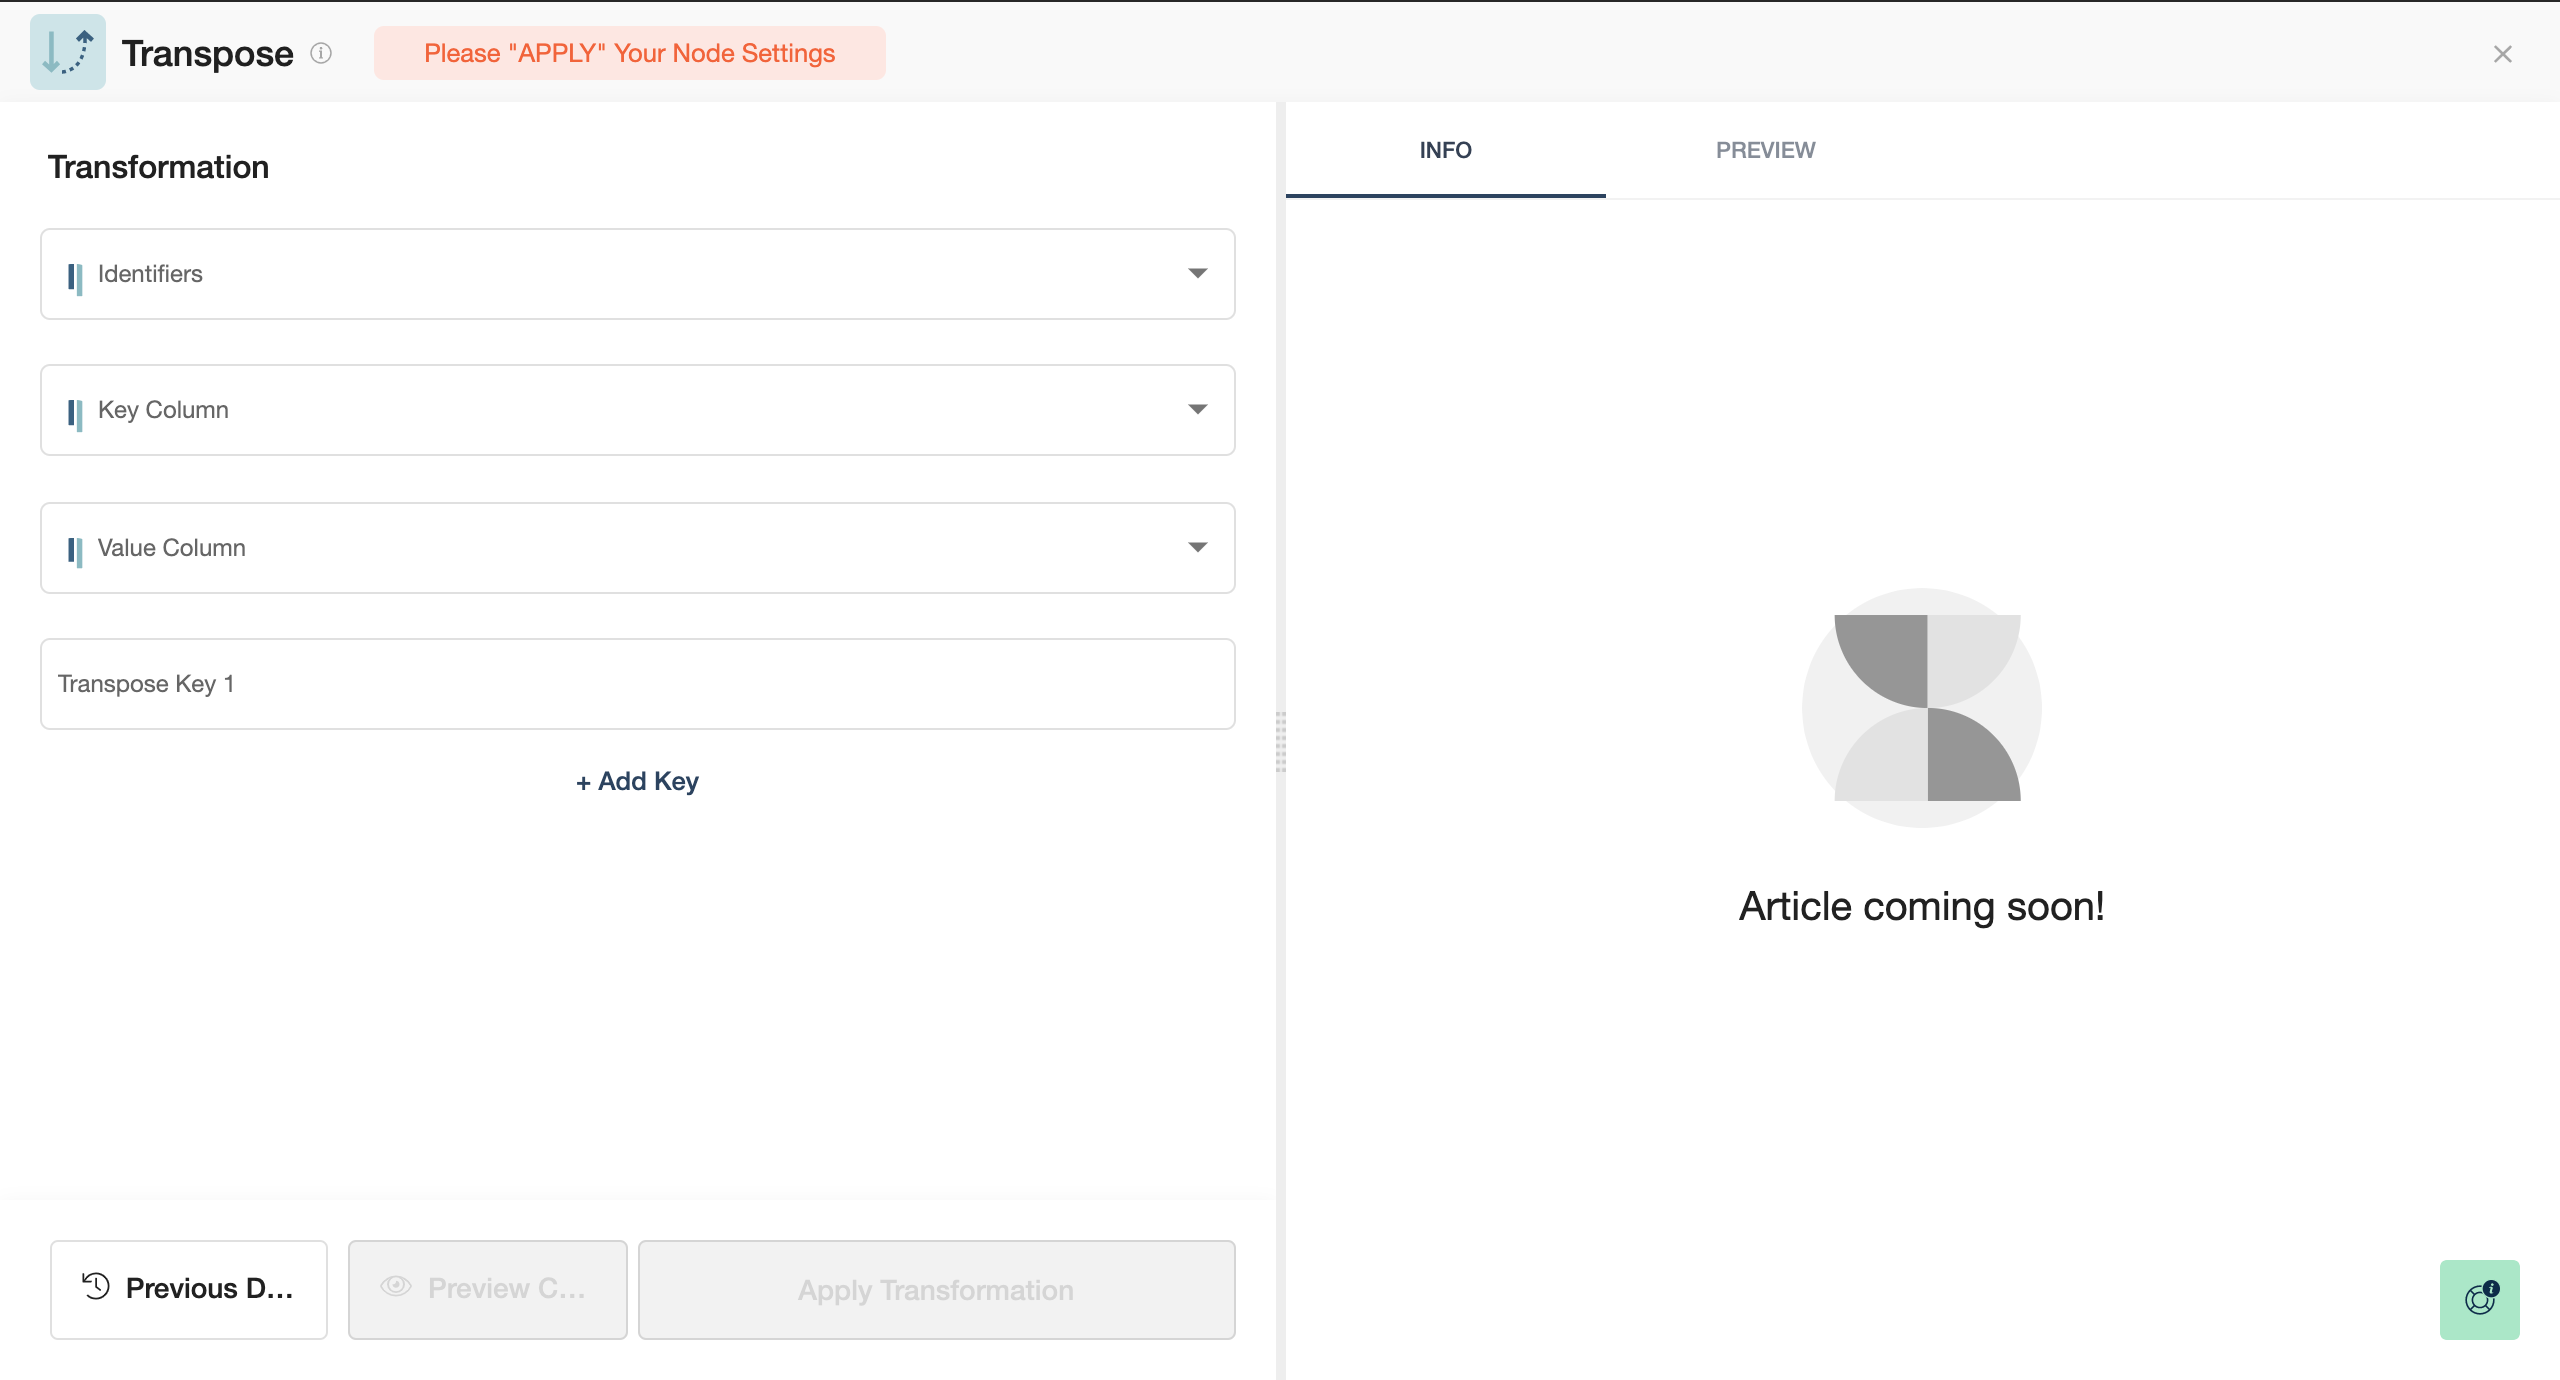
- Continue by determining your preferred identifiers. These are the columns you want to keep as columns and not transpose.
- Select the Key column. This the column in which the values will become their own column.
- and your Value column. This is the value which will be carried on to the rows of the new columns.
- Lastly choose your Transpose key. In other words, the values from the rows of the Key Column that you want to transpose.
- You can easily add additional keys you want to extract by clicking on + Add Key or Deleting them by clicking on Remove Bin.
Once you're done turning your columns into rows, you can either perform further transformations or, if you want to export the new data table, click Commit Model.
Example
Let's say you have a table that looks like this:
| Name | Date | Type | Value |
| Fruit | 2021-10-01 | apple | 2 |
| Fruit | 2021-10-01 | pear | 4 |
| Fruit | 2021-10-01 | peach | 1 |
And you'd like to use the transpose tool to be able to make the table look like this now:
| Name | Date | apple | pear | peach |
| Fruit | 2021-10-01 | 2 | 4 | 1 |
You'd choose the following settings for the node:
| Identifiers | Name, Date |
| Key Column | Type |
| Value Column | Value |
| Transpose Key 1 | apple |
| Transpose Key 2 | pear |
| Transpose Key 3 | peach |
Was this article helpful?